Sunday, May 26, 2013

Decorator Weight Cotton Fabrics

I now have in store some of the new decorator weight cottons. These are still 100% cotton but they are slightly heavier in weight and can be used for placemats, cushions, bags etc.
I made a tote bag using one of the fabrics which has 4 different prints across the width -
These photos show both sides of the tote bag. I used 50cm of the fabric (but could have made it less as the bag is a little floppy being that wide, probably 40-45cm would have been better). I cut the basic bag rectangle out of 3 designs across the fabric and the handles from the 4th design. I did line this with plain red homespun. This fabric is NZ$31.45 per metre
I love the design of this one, very abstract yet could be likened to an onion. Black and cream heavier weight cotton. NZ$34 per metre
These birds (oops sorry I got it upside down) are very cute, they are NZ$29.70 per metre
and last, but not least, this NZ design
These Pohutukawa flowers are NZ$25.70 per metre.
Why not try some fabric that has a little more body to it? Would make great cushions for outdoors as well.
Dianne

Saturday, May 11, 2013

Shop Hop Quilt 2013

It will soon be time for this years Shop Hop to take place (Oct). I have been hard at work designing my quilt as I wanted to show it at Tote & Gloat this year. There are only 5 shops this year since Clare sold her shop. There will be 5 blocks, you collect 10 blocks, 2 versions of each block and you can make your own quilt or you can choose to purchase the kit to complete the quilt that you prefer. Each of the 5 shops has their own colourway and design based on a medallion style quilt setting. It took me a while to make as I was designing as I went.
Here it is -
In the centre of the design it is a square shape which has been tilted by adding triangles to each side. This is so easy to do, no hard sewing, even though these are pieced triangle portions. I used 6 of the blocks in the centre portion of the medallion. They appear to be on point because of the tilting of the centre square.
Then I used the remaining 4 in the border - these are easier to set in than you think as all you need to do is add triangle to each side to make them a rectangle (so they are on point as in the centre) then sew the borders on either side. I have used some of my die cut shapes to fill in the background are a spaces, these will be included in the finishing kit. A very Autumn coloured quilt using a mixture of batiks and prints. Soon I hope to start the quilting on this. Call in to view it if you are thinking of doing the Shop Hop this year.
Dianne

Die Cut Shapes

I recently purchased an Accuquilt Go Baby die cutting machine. These are fun because they cut accurate shapes in seconds. No fiddly cutting with scissors. I have cut oak and maple leaves as well as flowers and stems. By cutting carefully you can use the 'waste' fabric.
Here are some pieces left after cutting -
A maple leaf was cut from this piece, obviously.
And these ones are petals, or they could be leaves. I cannot bear to throw out anything I think may be useful. So yesterday I started playing around with the 'waste pieces and created this piece.

The oak leaf squares were already prefused so I placed them over a piece of multi dye fabric in a 4 patch design. I then sewed green strips along the sides and top and bottom of this central piece. Along the top and bottom I fused 2 strips that I had cut circles from. Then it was just quilting the piece. I think it looks really good for something made from the pieces you might throw out, don't you?
Why not call in and see me - I can demo the cutter and advise you on prices. I sell the Go Baby and all the dies, so ask me for the 'special deal'. I also have prefused precut shapes and 'waste' pieces for sale.
Here is another piece I have started -
I had cut out 2 maple leaves from this piece of fabrics. I fused it to the multi dye background and now will sew borders and then quilt.
Here are some of the oak leaves cut and ready to fuse -

I used these on my shop hop quilt for this year. Check out the next blog for pictures of that.
Call in and see me and all the samples
Dianne

Tote and Gloat and a mini tutorial on painted wholecloth miniature quilt

Doesn't time fly by when you are busy - I haven't blogged for the last few weeks as I have been very busy organising the tour of Cindy Needham from California to Palmerston North NZ for our local Tote & gloat show as well as trying to get a challenge done.
Cindy was fabulous - such a generous and giving tutor. Her lecture at Tote & Gloat and the 3 classes she did for Rose City Quilters were wonderful. Everyone who attended the classes thought she was one of the best tutors they had ever had. A big Thank You to Cindy for coming to visit us.
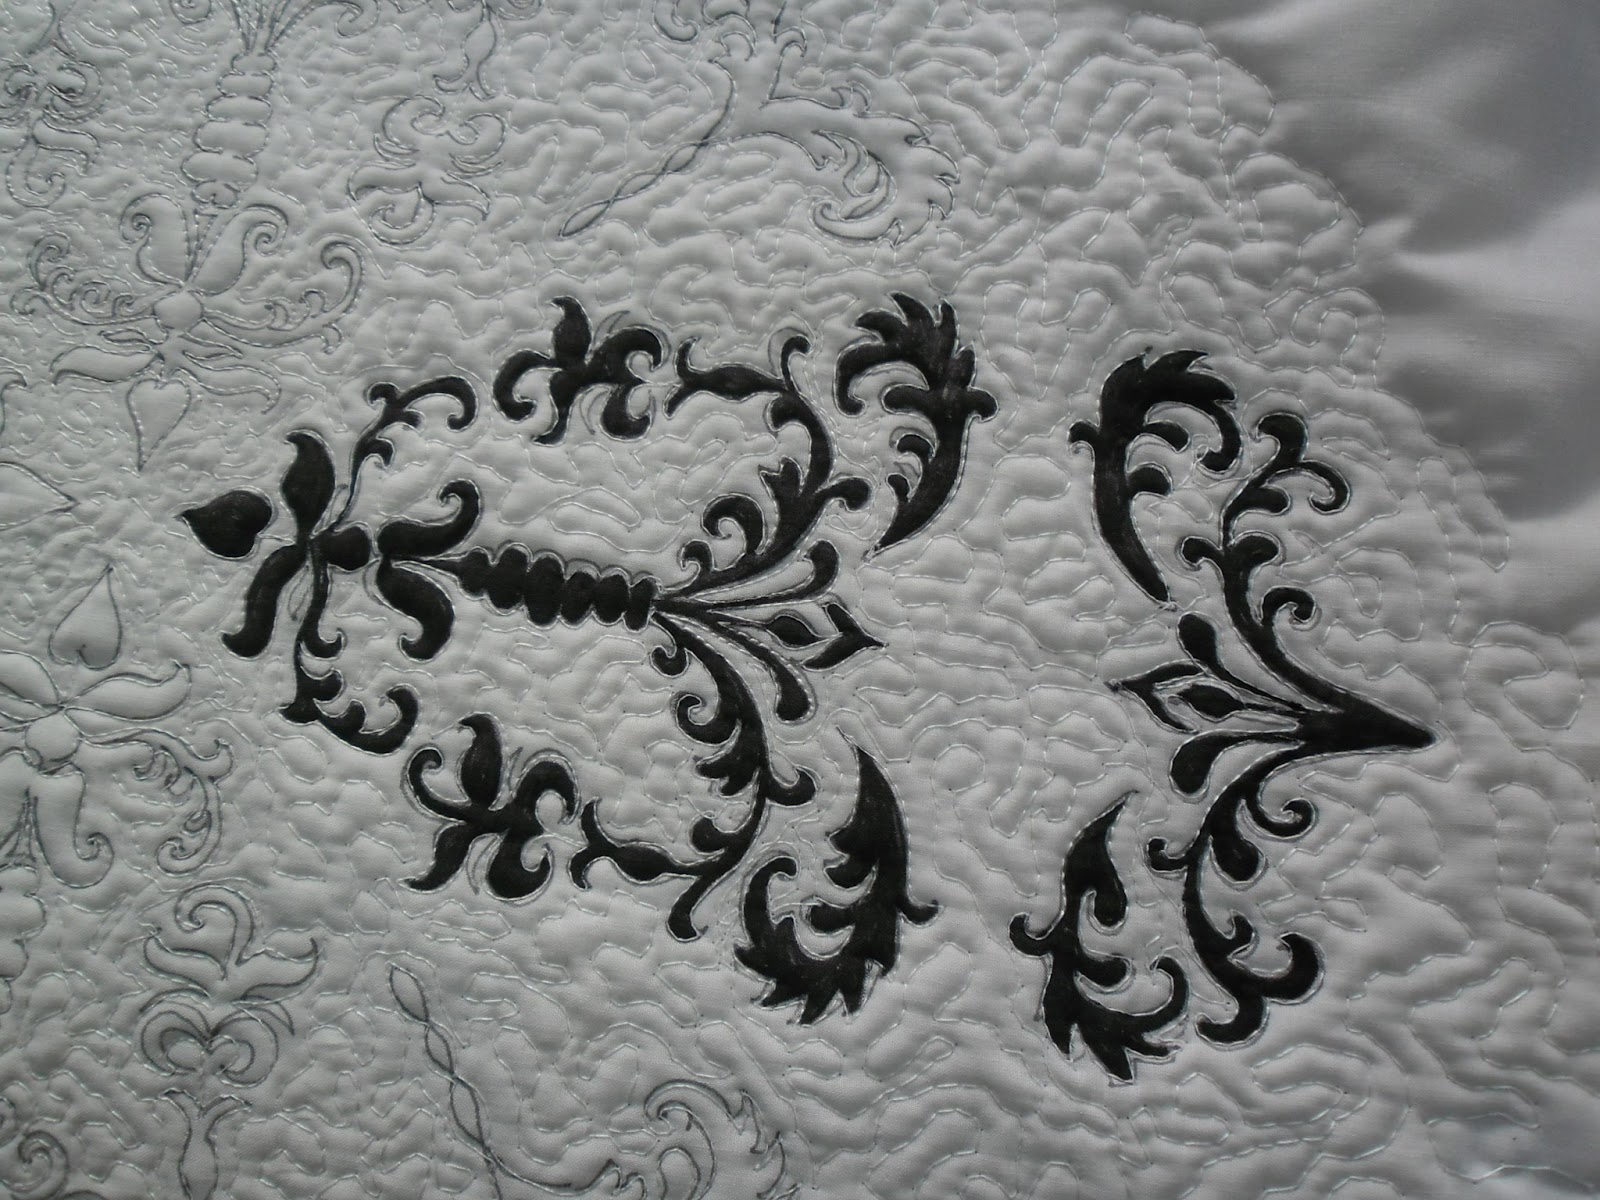
For the challenge I made a wholecloth quilt. The challenge theme was "Inspired by a Paper Napkin (serviette)". My mother gave me this paper napkin, it was just so elegant. I drafted up a variation of the pattern in the napkin and then decided how to make the quilt. I chose to do a miniature only 12" square. I decided to make this using white batik fabric, pure silk thread and a #60 needle. I quilted the design first and then went back and coloured in the 'applique' areas with a black Pigma Pen.
Here it is in steps -
I used a Frixion black (heat erase) pen to mark the design then machine quilted the 'applique' areas and started to colour them in to see if it would work. Then I machine quilted the entire background area. Using the small needle and silk thread means you can quilt very tiny stitches.
This is kind of scary because you have to stay in the lines, if it goes over you can't remove the pen. So just fudge it and make a slightly larger line outside the quilting stitches.
Yay, it looks good. Now how to edge it??? I decided to make the edges wavy and to face it as I do not like the look of an extra binding on it.
I was very pleased with the way it turned out, and I won a Merit Ribbon so I am very pleased.Dianne


Sunday, April 7, 2013

Yummy New Patchwork Fabrics

Some yummy new patchwork fabrics have arrived in store recently - here are a few of them.
These 2 are from Andover Fabrics. I love the modern fresh look and the wonderful colours. They are NZ$26.30pm.
These next ones are part of the new collection from Lonni Rossi

This one the design runs from the outside edge of the fabric to the centre on both sides, so could be used as a border style fabric.
These make a lovely collection of subtle yet distinct patterns. All NZ$26.30pm
Then there are these gorgeous fabrics from the Stonehenge range.

These are richly textured patterns which look good in patchwork quilts. NZ$29.40pm
And this lovely stone effect pattern -

I just love this one. It is so gorgeous. NZ$28.50pm Oh for the time to make everything I want to make.
I'll upload more tomorrow, I have some lovely patterns in store so I'll feature those.
Best wishes to all
Dianne

Tuesday, March 26, 2013

More Hollis class photos

Here is another photo from Hollis' class this time painting hands. Gee they look so sunburnt, but wait till the end.
With the background painted in. Now to batch overnight then wash and rinse excess dye out.
What a difference with the excess colour washed out, now looks more natural.
I have now finished quilting this.
I have also been working on designing and quilting my entry for Symposium in Taupo. Just sent off the photos for entry yesterday so keep my fingers crossed, it gets accepted. I don't think I should show it until it has been through judging - hard to know.
Wishing everyone a Happy Easter. I will be closed Friday, Sunday and Monday but will be open Saturday morning.
Dianne

Monday, March 4, 2013

Hollis Chatelain Class

A couple of weeks ago I attended a 5 day class with Hollis Chatelain in Auckland. 6 of us from Rose City Quilters went up to join with 14 others, 2 from Australia, to particiapte in learning how to dyepaint on fabric. I have done some dyepainting before but this was detailed painterly style so it was good to attend and find out more about how to achieve such wonderful work. Hollis is from the USA. Her work is absolutely amazing, check out her website hollisart.com.
We started by drawing our chosen designs onto pretreated cotton fabric and then made up some thickened dyes and started to paint.
After painting portions we had to cover them with plastic so they didn't dry out. Here is the finished product just painted.
And here is the same piece after washing - see how much colour has come out. You have to judge how dark to paint the picture because you loose 2-3 shades after washing. This will require much practice to judge.
I have just finished quilting him so here is the almost finished quilted painting
and a couple of details
Anyone who knows my cat Tiger will recognise his eyes. I am very pleased with what I did but it will take lots of practice to get anywhere near as good as Hollis.
If you ever get a chance to take classes like this I recommend it. We are always learning, no matter how much we already know. Keep absorbing and challenging yourselves.
Go for it and don't worry if it doesn't turn out perfect first time, you'll get better.
Anyone wanting the dyes and thickening agents call in and see me or email for details. I do stock the Procion dyes, fabrics, soda ash, Teric (Syntrhapol), brushes etc.
Got to go and open up the studio now.
Dianne